Some basic operations with the printer are still available during the printing.
After you start the print, the PRINTING screen appears. Here you can pause your print by pressing the PAUSE button, or adjust the printing process by pressing the CONTROL button.

After the print is paused, the print head and buildplate will return to their default positions. Extruders stay hot during the pause. You can see all the control capabilities over the paused print in the picture below.
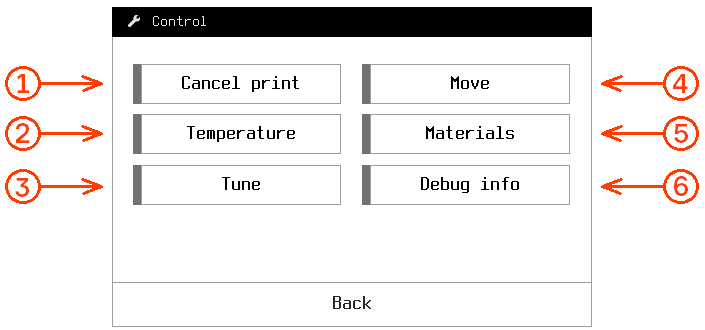
Here, the following settings are available:
1 — Cancel the print
2 — Cool or heat up extruders and buildplate
3 — Printing parameters tuning. Here, the following settings are available:
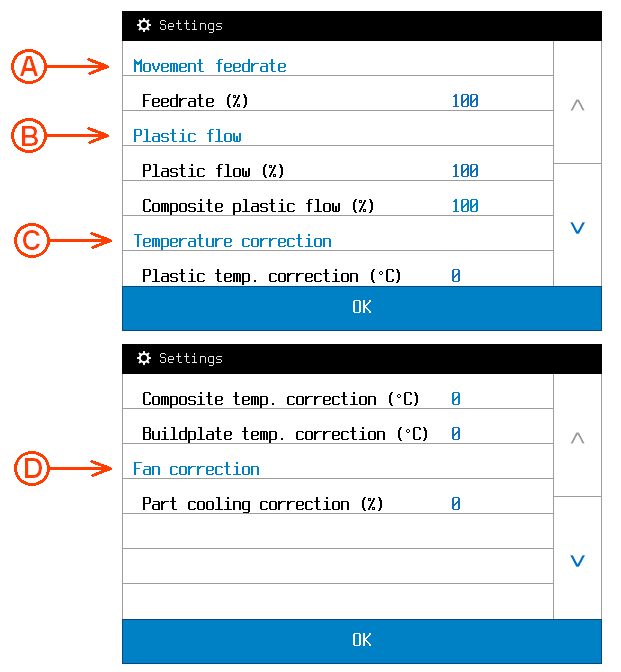
A – Movement feed rate determines printing speed (100% by default, can be varied within a range of 25 to 200%).
B – Plastic flow parameters adjust extrusion coefficients of plastic in a percentage manner. Plastic flow range is from 25 to 150%).
C – Temperature correction value increases or decreases predefined temperature on set increment (0 °C by default, can be varied within a range of -100 to 100 °C). Note that the temperature is limited by 270 °C for extruders and 120 °C for buildplate.
D – Fan correction value increases or decreases predefined fan power (0 % by default, can be varied within a range of -100 to 100%).4 – Axis positioning (see MAIN SCREEN p 7.1)
5 – Loading/unloading materials (see LOADING MATERIALS p 7.3)
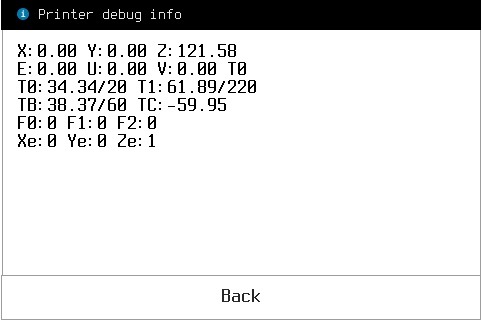
6 – Debug info is service information (for service engineer if required)
Press the RESUME button to continue the print from the stopping point.
Press the CONTROL button in printing mode to tune the printing process. The screen when the CONTROL button is pressed in the printing mode is shown below.
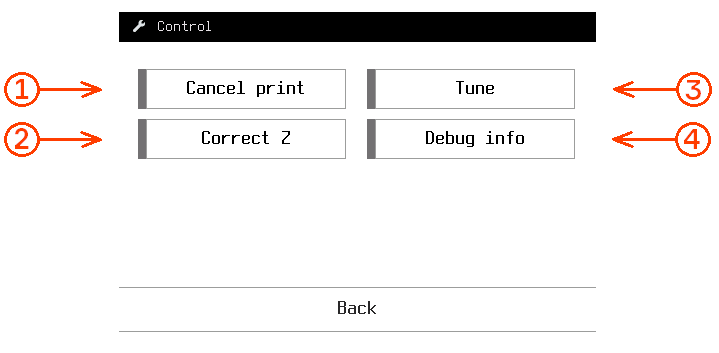
Here, the following settings are available:
1, 3 and 4 buttons are the same as for paused print
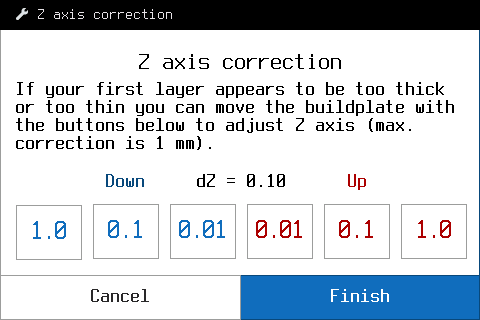
2 – Correct Z. If the first layer of the print is too thick or thin you can move the buildplate up or down by 0.01/0.1/1 mm to achieve the optimum thickness of the first layer. Notice, that this setting does not influence the Z axis calibration.
