How to print composite part

From this video you will know:

  • how to make a decision about part orientation on the build plate
  • how to set up a project for printing
  • how to reinforce a part with perimeters
  • about the specifics of layers with fiber
  • how to observe inner structure of a reinforced part
  • how to save an Aura project

MAXTEMP

There are two options to get maximum temperature error on the Composer.

  • In standby mode, when you see temperature 989 С° on one of the extruders
  • During printing, when you get MAXTEMP trigger error

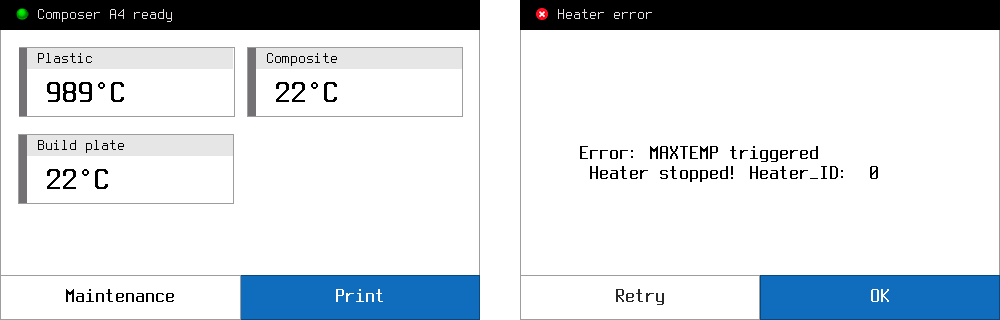
This error comes, when Composer get temperature more than 275 C° from one of the extruders (Heater_ID) or more than 125 C° from buildplate.

Caution!

If you set the temperature in gcode more than 275 С° on extruder or more than 125 С° on buildplate, you will get MAXTEMP error, although the printer will work fine.

To identify the cause of the error, you need to check the temperature sensor. Operating procedure will be:

  1. Turn off the printer
  2. Remove the protective cover from the print head
  3. Disable flat cables
  4. Measure the resistance at the defined connectors.

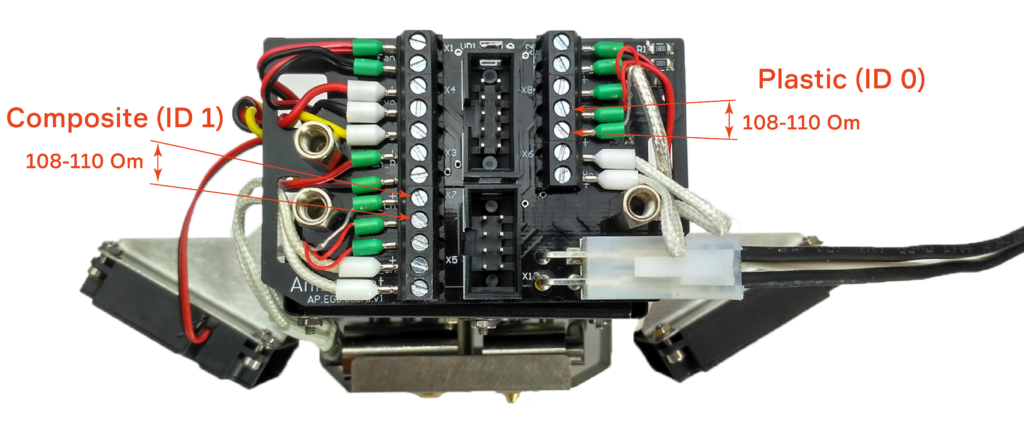
If the measured resistance is close to the correct (108-110 Om), it’s means that the temperature sensor works good. You will need to contact your local distributor or write us on support@anisoprint.com

MINTEMP

There are two options to get minimum temperature error on the Composer.

  • In standby mode, when you see temperature -242 С° on one of the extruders
  • During printing, when you get MINTEMP trigger error

This error comes, when Composer get temperature from one of the extruders (Heater_ID) less than 10 C°

To identify the cause of the error, you need to check the temperature sensor. Operating procedure will be:

  1. Turn off the printer
  2. Remove the protective cover from the print head
  3. Disable flat cables
  4. Measure the resistance at the defined connectors.

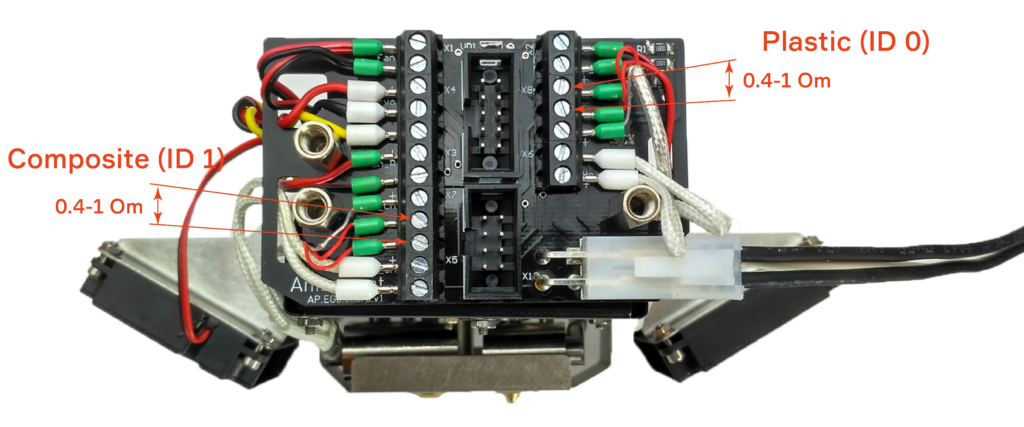
If the measured resistance is close to the correct (0.4-1 Om), it’s means that the temperature sensor works good. You will need to contact your local distributor or write us on support@anisoprint.com

How to print with plastic

From this video you will know:

  • how to upload model
  • how to modify model
  • how to set-up model for plastic printing
  • what is the Session panel
  • what kind of settings you need to achive the best result
  • how to watch Geometry and G-code
  • how to save G-code for printing

Heating errors

When some of heating units is fail, you will see error on screen. All heating errors has ID number, which shows the unit in fail.

  • Heater_ID: 0 – plastic extruder
  • Heater_ID: 1 – composite extruder
  • Heater_ID: 2 – buildplate

Extruders switching

  • After a long and intensive work without maintenance (more than 2-3 months), it is necessary to replace the lubricant in the lifting mechanism, see the assembly instruction.
  • If an unsuccessful switching occurred with cold plastic extruder, its means the plastic has solidified between the extruder and the bracket and blocked the switch. Heat the extruder and clean the bracket.

Plastic feeder

Feeder clicks

On the first layer

  • The buildplate is too close to the nozzle. Following the instructions to adjust the zero level
  • In some cases, retracts cause the click sound, this is normal.

On the next layers:

  • Plastic extruder clogged for some reason, check the problem here
  • Incorrectly selected Aura setup. Try to change parameters to solve over extrusion.
  • The filament could flew off the spool, twisting around the axis.

Plastic extruder

Сlog

  • Check the operation temperature on printer screen, it should be same as recommended by filament manufacture.
  • Most likely you have plastic jam inside the heat break. To solve this problem, you have to disassemble plastic extruder in reverse order than assembly and clean the teflon tube

Under extrusion

  • Clean nozzle hole, using needle from the Tool kit.
  • Very often, the problem with the under extrusion is come from wrong Aura setup. Try to change parameters responsible for the flow
  • The filament could not sufficiently pressed in the feeder, tighten the screw using the key from the kit so that the nut is in the middle

Plastic leak

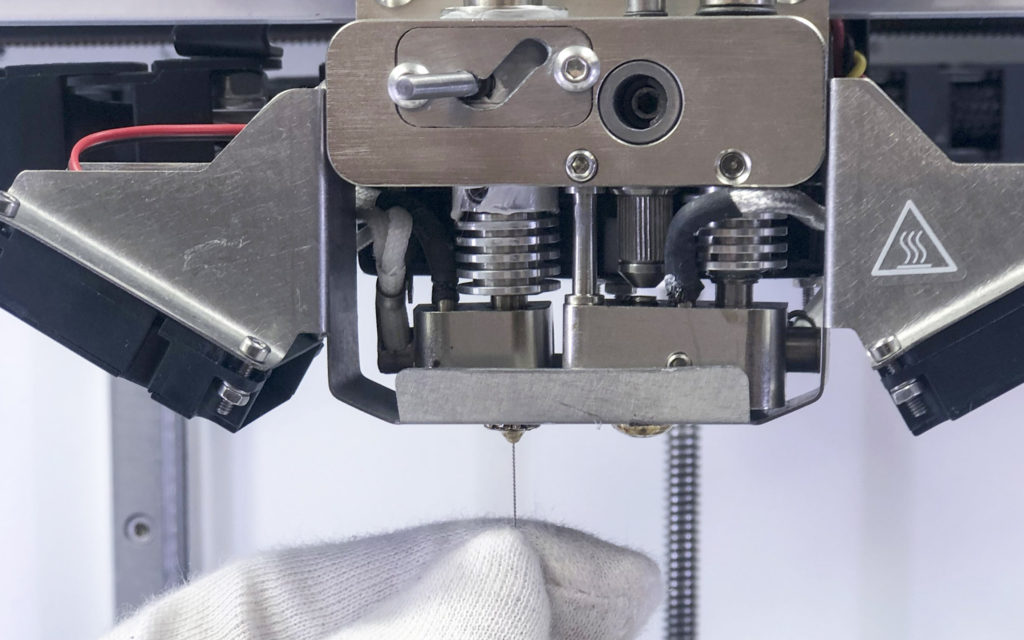
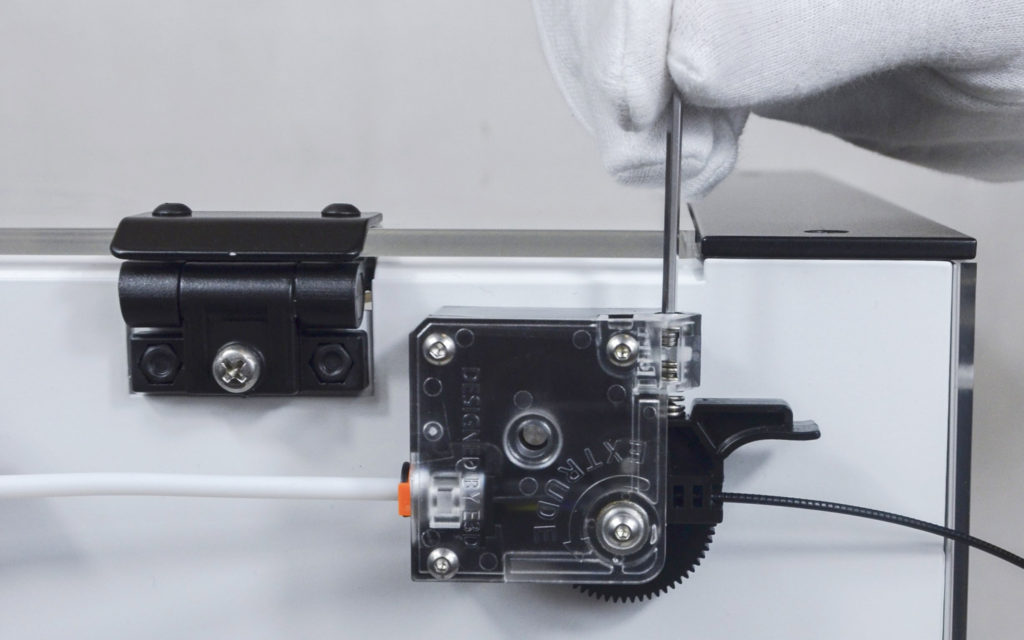
If the nozzle was not enough tighten, during assemble, plastic could leak along the thread up and down. Please tighten the nozzle as it was shown in the instruction

Fall down

Plastic extruder could fall down if fastern had loosen. Please see assembly instruction to fix this problem