To prepare your model for printing, you should go through the following steps:
- In the main menu go to “File” and click on the “Open model…”.
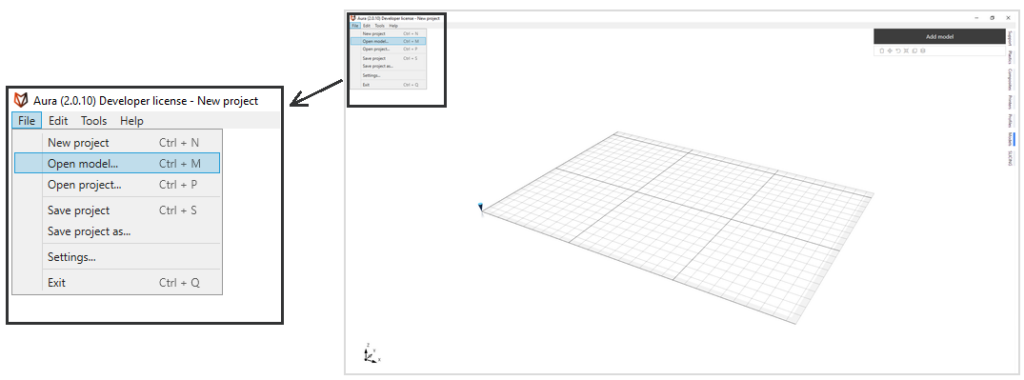
2. Choose your model file and place the model on the buldplate. Note, that your model should be in one of the following formats: *.stl, *.step, *.stp, *.3ds, *.obj.
3. Adjust printing settings in the SLICING panel from the main tabs and click GENERATE.
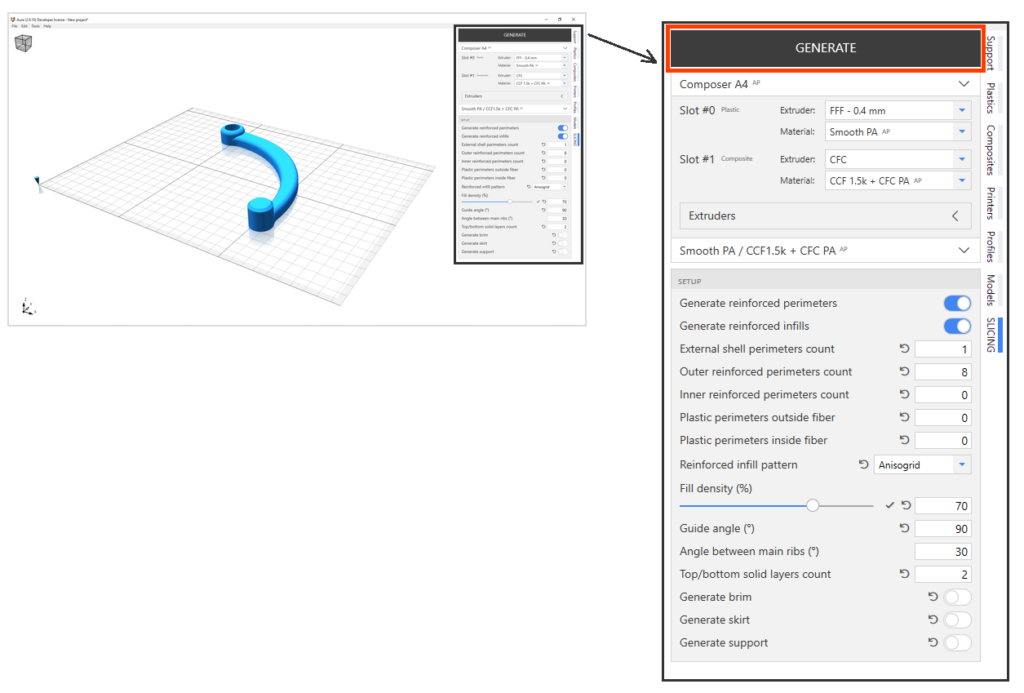
4. After a successful generation of the code, you will be offered to view the code or save it to a file. You can press VIEW CODE to see the layout of your model in a 2D or 3D view.
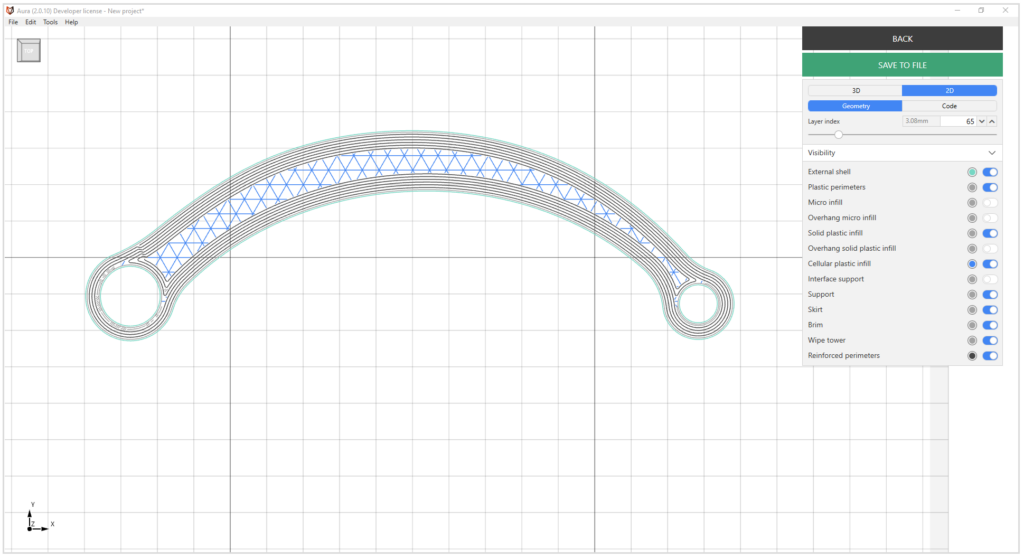
5. You can save the code by pressing the SAVE TO FILE button. If you want to change printing settings you need to press the BACK button, change desired parameters and press the GENERATE button again.
You can find more detailed Aura overview and video tutorials on the website anisoprint.com/aura/